Prerequisites start here if you are new
ShopKit is a source-code app template, so you build it with the standard Flutter tools rather than uploading it somewhere. If you have used a terminal before, skip to Getting Started. If you have not, this section covers everything you need — it takes about fifteen minutes.
What you need installed
| Tool | Version | Why |
|---|---|---|
| Flutter SDK (includes Dart) | 3.24 or newer | Builds and runs the app. Follow the official installer for your operating system. |
| VS Code + the Flutter extension, or Android Studio | current | Your editor. Either one works; you only need one of them. |
| Android Studio / Android SDK | current | Required to build for Android and to run an Android emulator. |
| Xcode | 15 or newer | Required to build for iOS or macOS. macOS only — you cannot build iOS apps on Windows or Linux. |
You do not need a server, a database, an API key or any paid account to run ShopKit. It runs on bundled mock data. See Third-Party Services & Costs for what does cost money, and when.
Opening a terminal
The terminal (also called the command line, shell, or console) is where you type the build commands. Every command block in this guide is meant to be typed there.
- macOS — press
Cmd+Space, type Terminal, press Enter. - Windows — press the Start key, type PowerShell, press Enter.
- Linux — press
Ctrl+Alt+T. - Inside your editor — VS Code and Android Studio both have one built in (VS Code: Terminal → New Terminal). This is usually the most convenient option, because it opens already pointed at your project folder.
The four commands you actually need
A terminal always has a "current folder" it is working inside. Almost everything below is about getting into the right folder and staying aware of where you are.
| Command | What it does |
|---|---|
pwd (Windows: cd with nothing after it) |
Prints the folder you are currently in. Use it whenever you are unsure. |
ls (Windows: dir) |
Lists the files in the current folder. If you are in the right template folder you will see
pubspec.yaml and a lib folder. |
cd <folder> |
Changes into a folder — "cd" is short for change directory. cd .. goes back up one level. |
clear (Windows: cls) |
Clears the screen when the output gets noisy. It does not undo anything. |
Tip — never type a long path by hand. Type cd (with a trailing space), then
drag the folder from Finder or File Explorer onto the terminal window and press Enter. The full path is
filled in for you, correctly, including any spaces.
Two more habits that save time: press Tab to auto-complete a half-typed folder name, and
press the ↑ arrow key to bring back the previous command instead of retyping it.
Step 1 — unzip the download
Extract the ShopKit zip to a folder whose path has no spaces and no non-English characters —
for example C:\dev\shopkit or ~/dev/shopkit. Some build tools still trip over exotic
paths, and this avoids a whole class of confusing errors.
Step 2 — confirm Flutter is working
Open a terminal — the folder does not matter for this one — and run:
flutter --version
flutter doctor
flutter doctor checks your setup and prints a list with a checkmark or a cross next to each item.
Work through anything with a cross before continuing; the output tells you what is missing and usually how to
fix it. Crosses next to platforms you do not care about (for example Xcode, if you are only building for
Android) are safe to ignore.
"flutter: command not found" / "not recognized as a command" means Flutter is installed
but your terminal cannot find it — the SDK is not on your PATH. Re-read the "Update your path"
step of the official install guide for your
operating system, then close and reopen the terminal so the change takes effect.
Step 3 — move into the template you want to run
Each template is its own independent Flutter app, so you always run commands from inside one template folder — not from the top of the zip. Using Core Kit as the example:
cd shopkit/templates/core_kit
ls
If ls shows pubspec.yaml and lib, you are in the right place. If it
shows a list of theme names instead, you are one level too high — cd core_kit to go in.
Step 4 — have somewhere to run the app
You need either a connected phone with USB debugging on, an Android emulator, or the iOS Simulator. Check what your machine can see with:
flutter devicesIf the list is empty, start an emulator from Android Studio (Device Manager) or the iOS Simulator
(Xcode → Open Developer Tool → Simulator) and run the command again. On macOS you can also run
flutter run -d macos or -d chrome to preview without any mobile device at all.
That is the whole prerequisite list. Continue with Getting Started — and if a command fails there, Troubleshooting lists the common first-run errors with their fixes.
Getting Started
- Install the Flutter SDK 3.24 or newer, then run
flutter doctoruntil it is clean. - Open a terminal inside the template you want to run, for example
shopkit/templates/core_kit. - Fetch packages, generate the platform folders, and run:
cd shopkit/templates/core_kit
flutter pub get
flutter create . --platforms=ios,android --project-name core_kit --org com.webkoding
flutter run
Do not skip flutter create . — it generates the native platform folders and is
the single most common first-run mistake. What ships in the download:
- Core Kit and Showcase —
android/,ios/,web/,macos/included, ready to run undercom.webkoding.*. - The nine niche templates —
ios/included; runflutter create .to addandroid/(and any other platform you want).
Run it with your own organisation to get your own bundle id — it only adds platform folders and never touches screen code. See Troubleshooting if a build still fails.
Default flow: Splash → Onboarding → Welcome → Home. All 48 Core Kit screens are wired through GoRouter — see Core User Flows.
To browse every theme in one app, run the showcase hub instead:
cd shopkit/templates/showcase
flutter pub get
flutter create . --platforms=ios,android --project-name showcase --org com.webkoding
flutter run
Screen Gallery
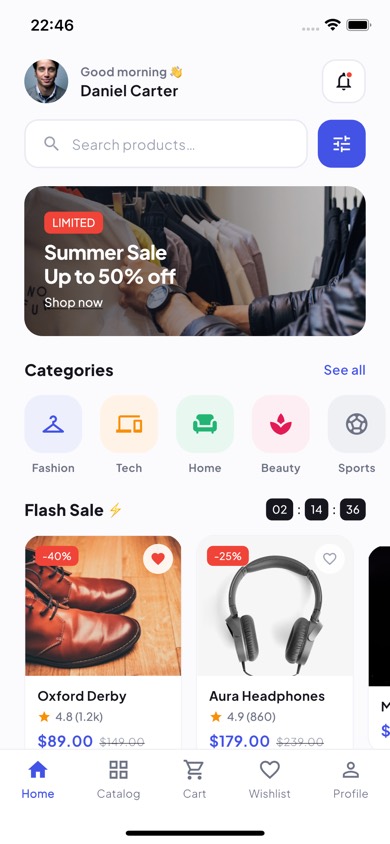
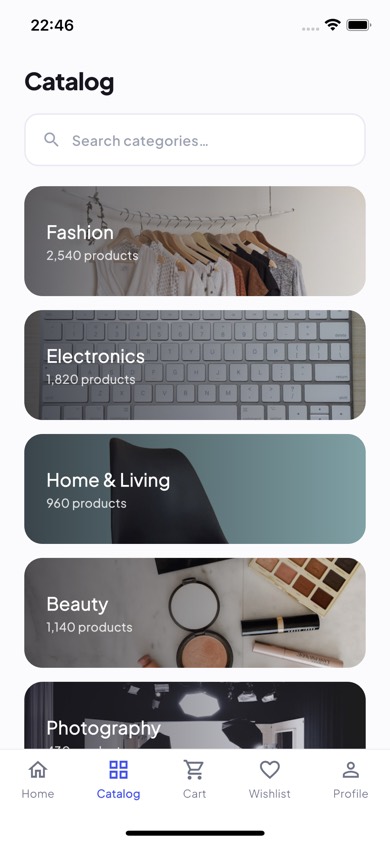
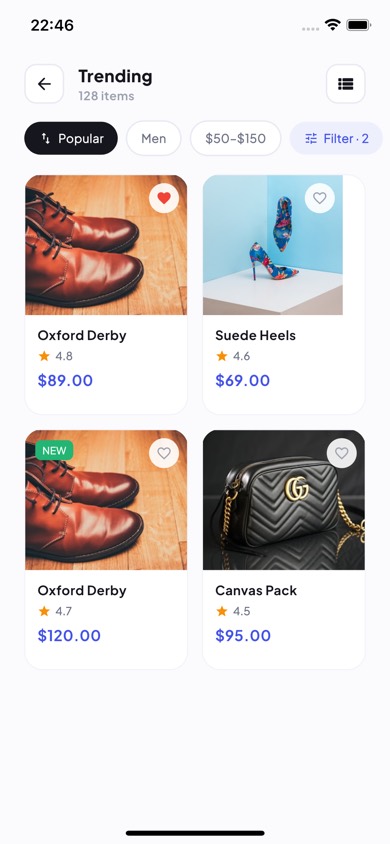
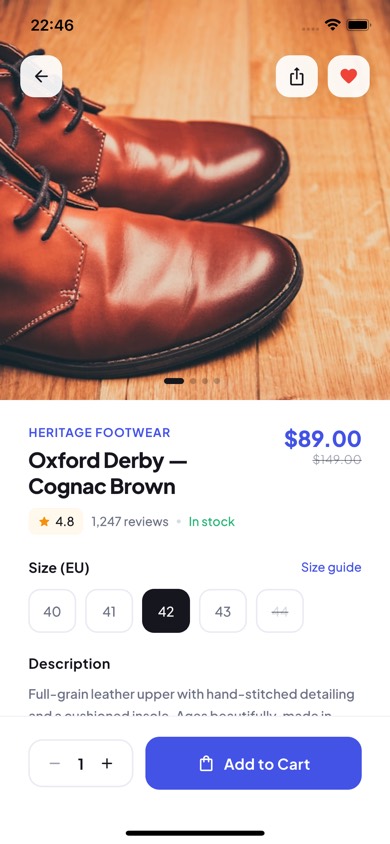
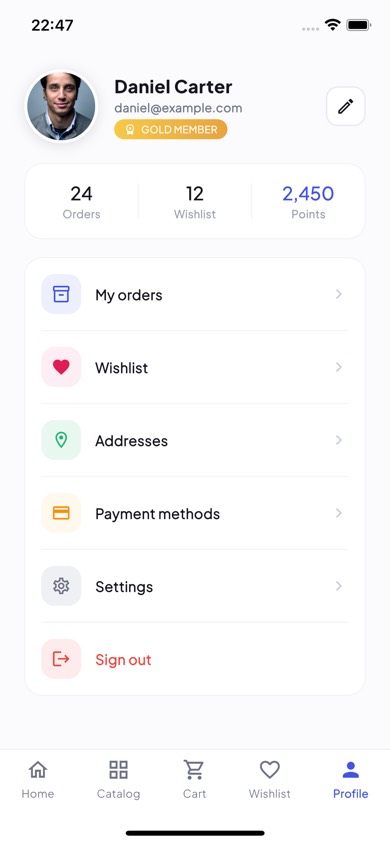
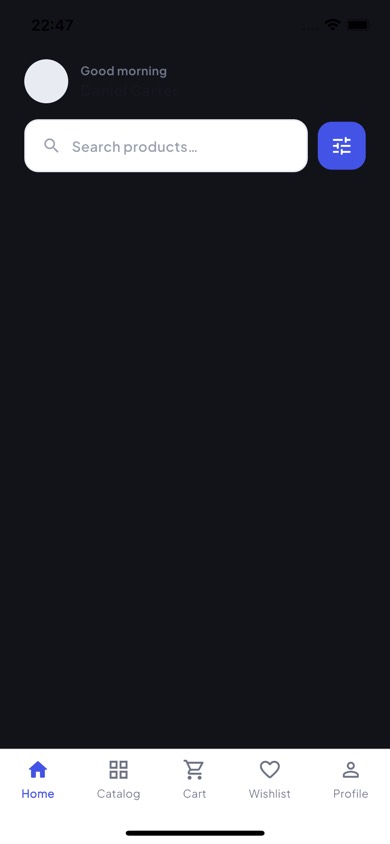
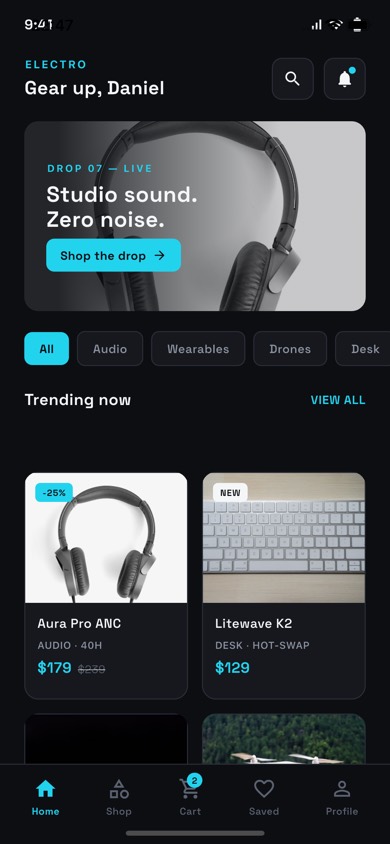
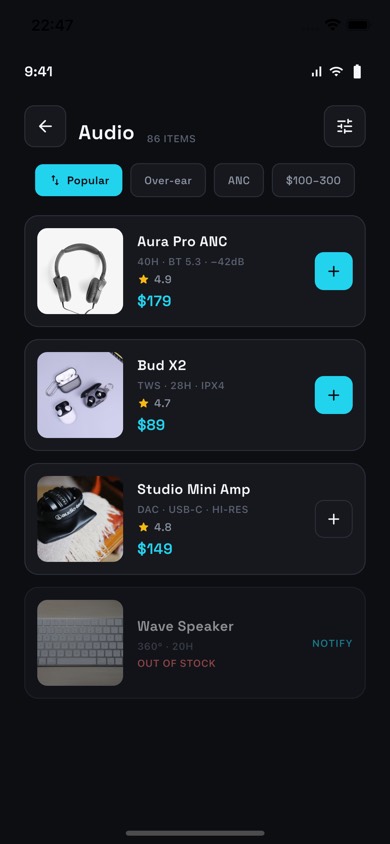
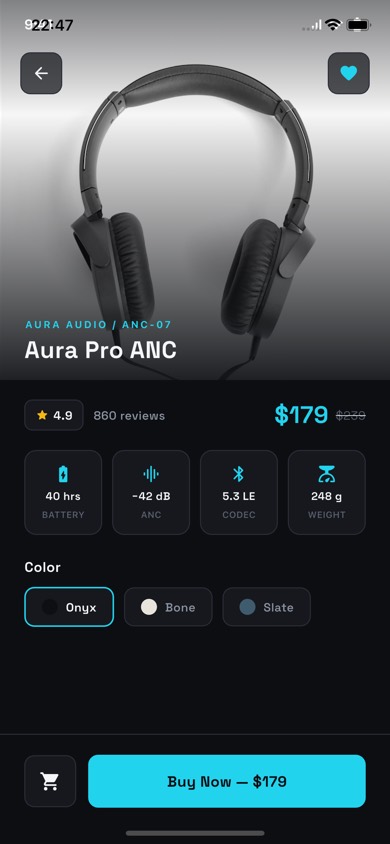
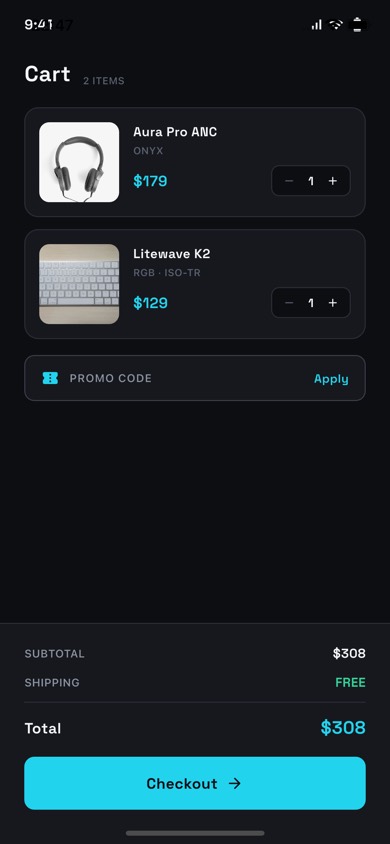
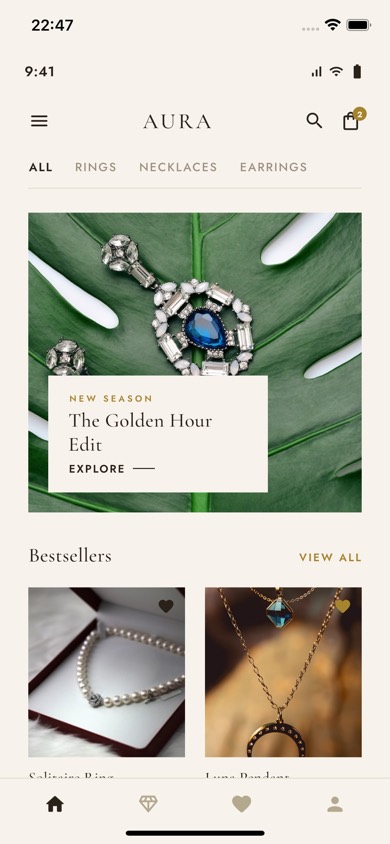
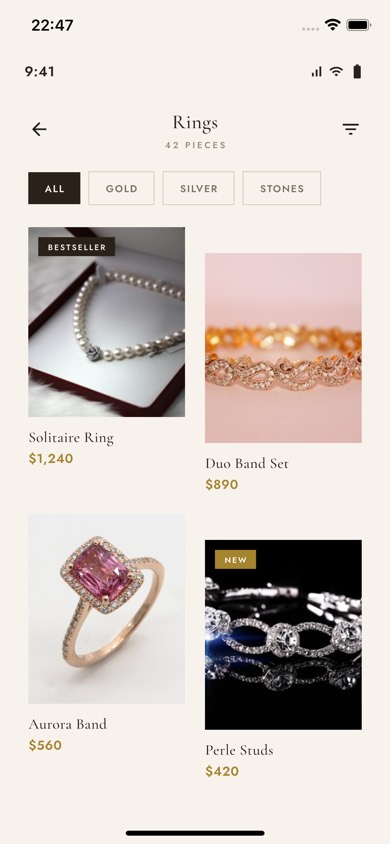
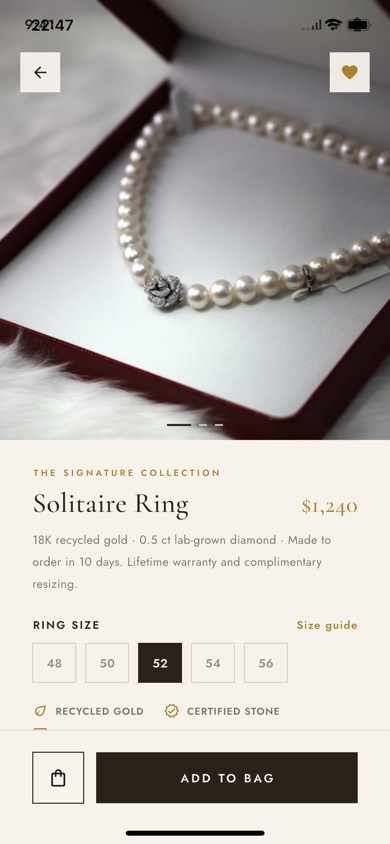
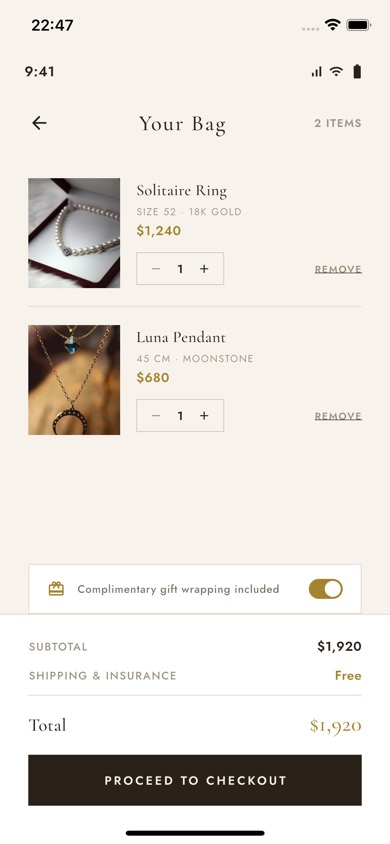
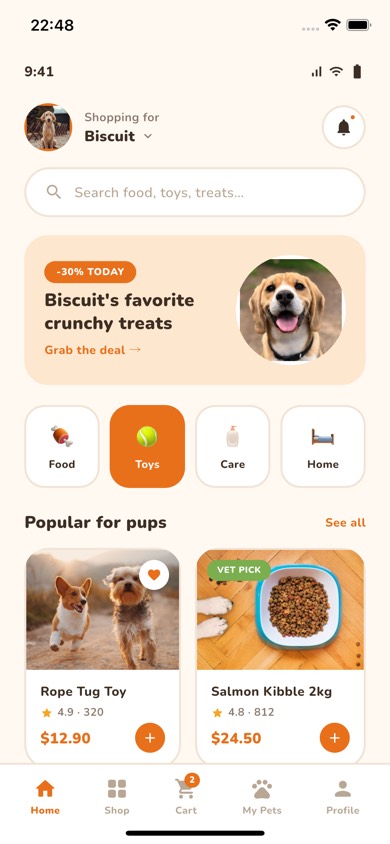
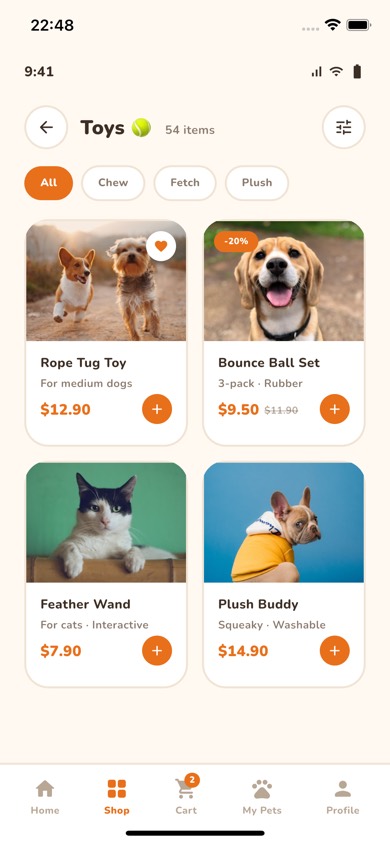
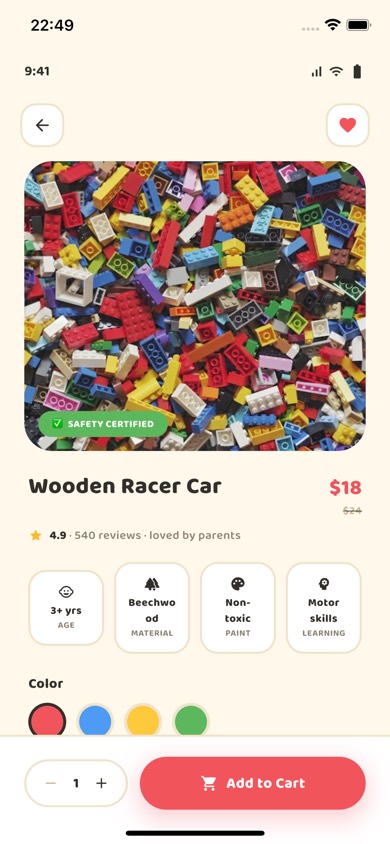
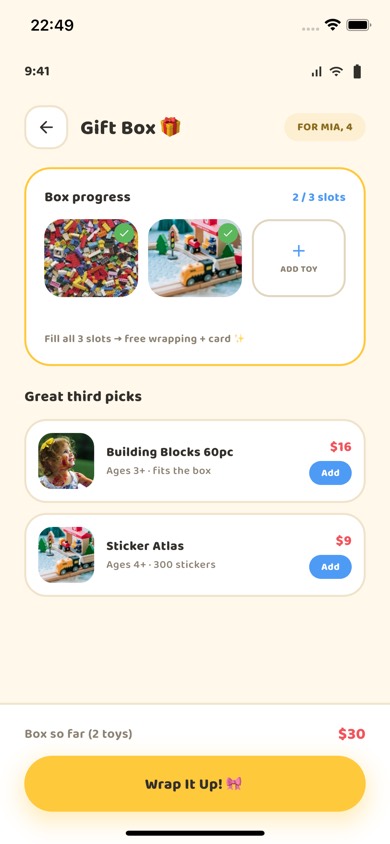
Real screenshots captured from the running apps — no mockups. Click any screen to enlarge. This page shows a curated selection; the full 192-screen set is browsable online at the live demo.
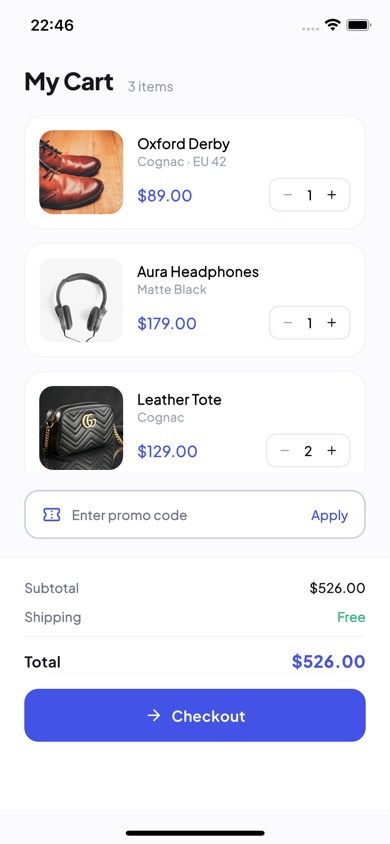
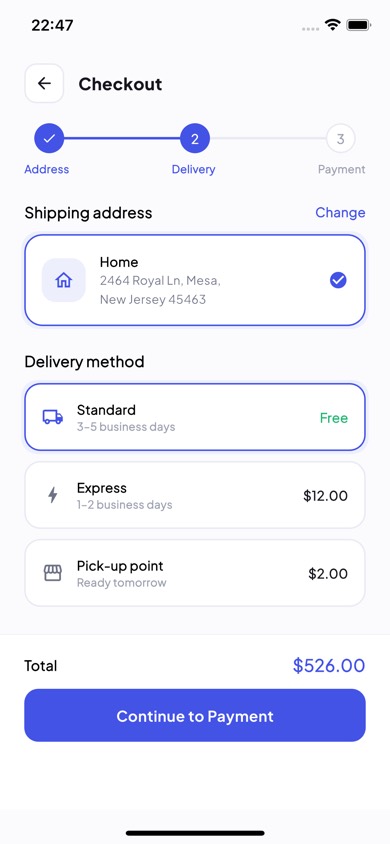
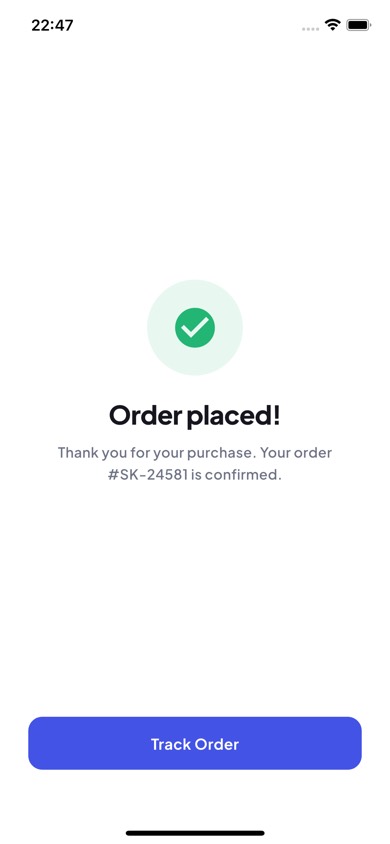
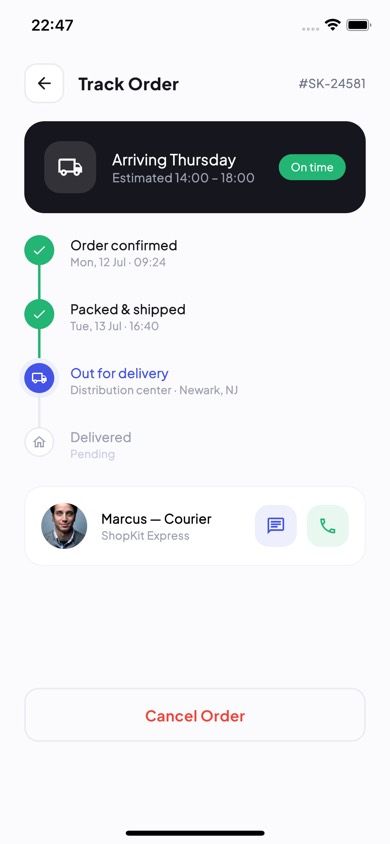
Core Kit General e-commerce · 48 screens (S01–S48) · #4353E6 · Plus Jakarta Sans
Electro Tech · 17 screens (E01–E17) · #22D3EE · Space Grotesk
Aura Luxury fashion · 16 screens (A01–A16) · #A5842E · Cormorant Garamond + Jost
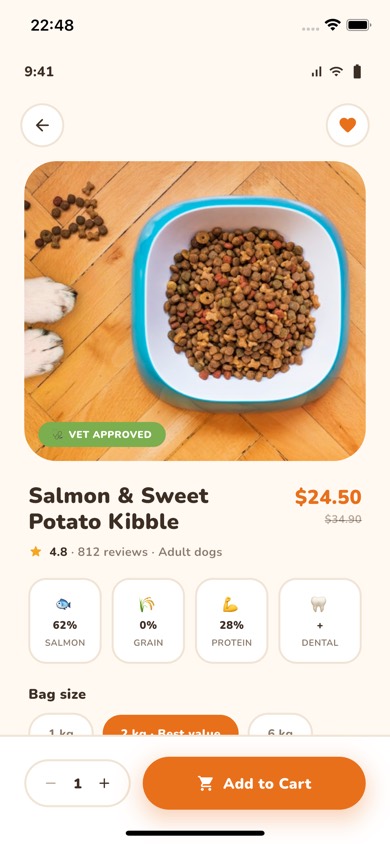
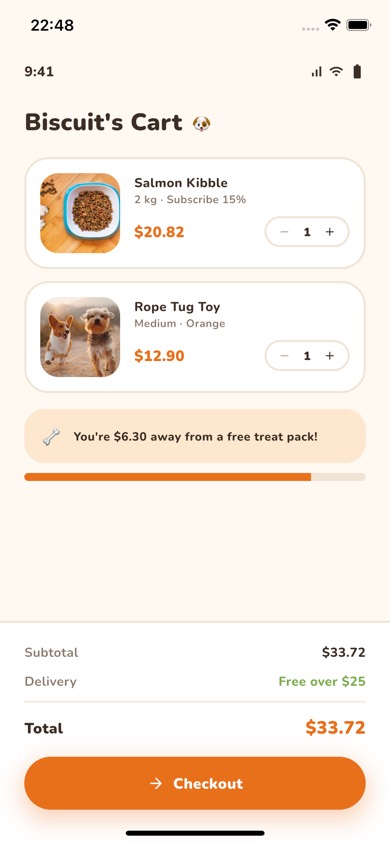
Pawly Pet · 16 screens (P01–P16) · #E8701B · Nunito
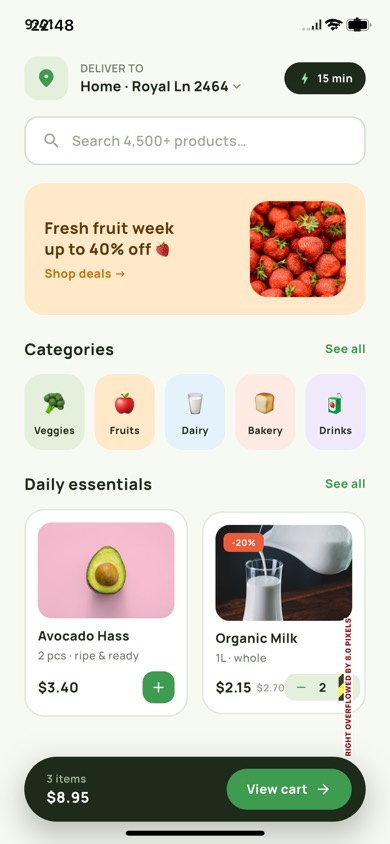
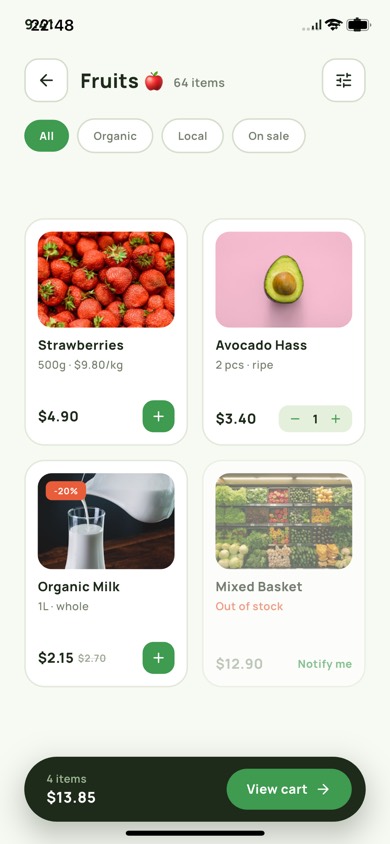
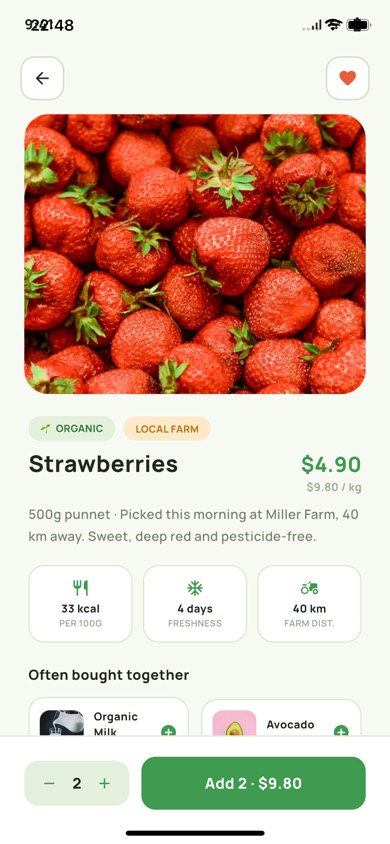
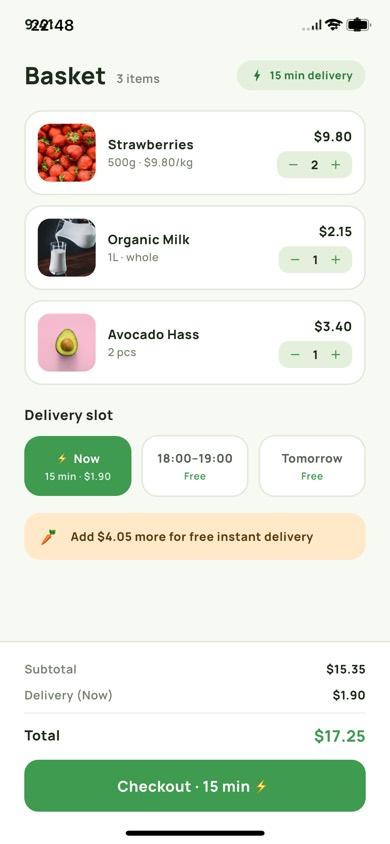
Fresho Grocery · 15 screens (F01–F15) · #3E9B4F · Manrope
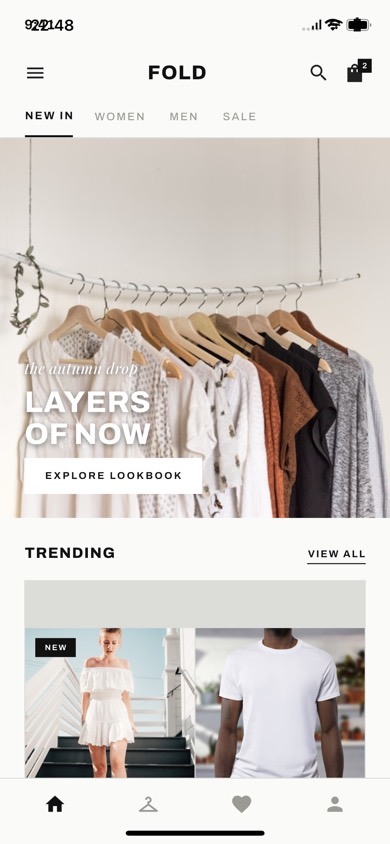
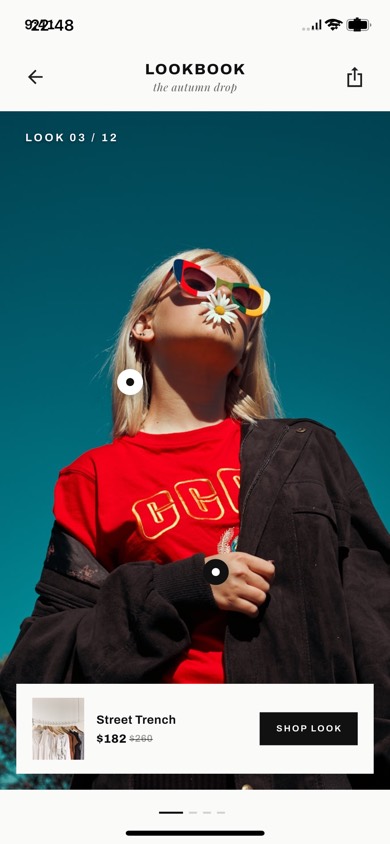
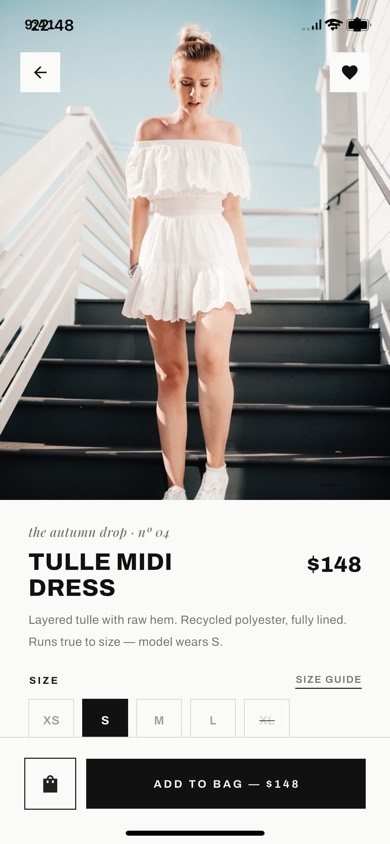
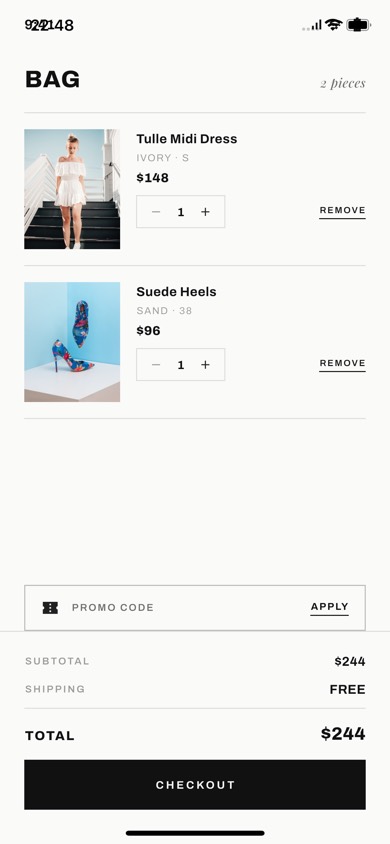
Fold Fashion lookbook · 16 screens (FL01–FL16) · #111111 · Archivo + Playfair Display
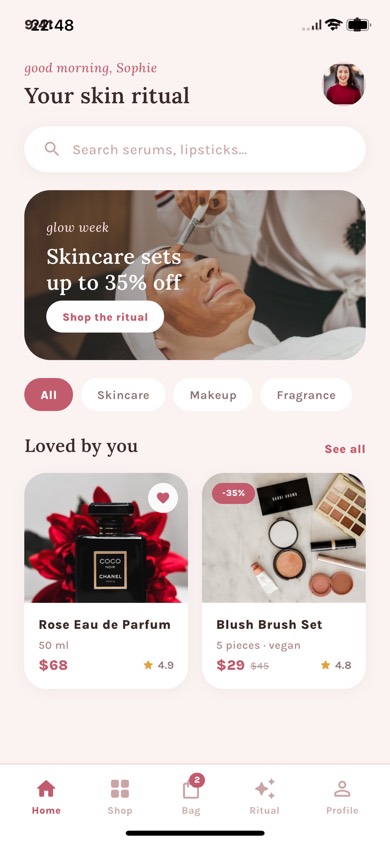
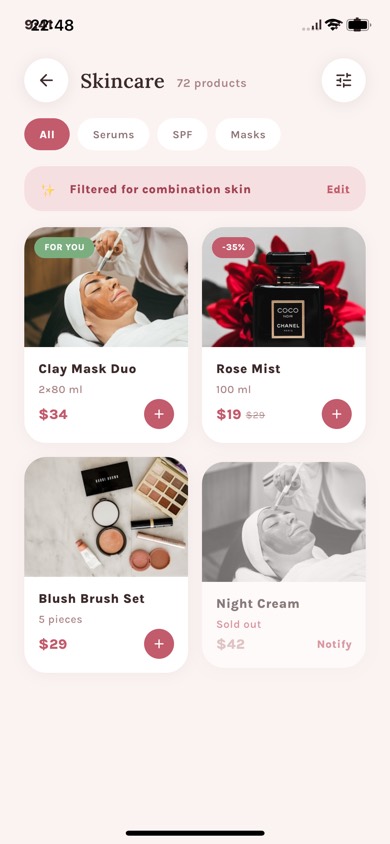
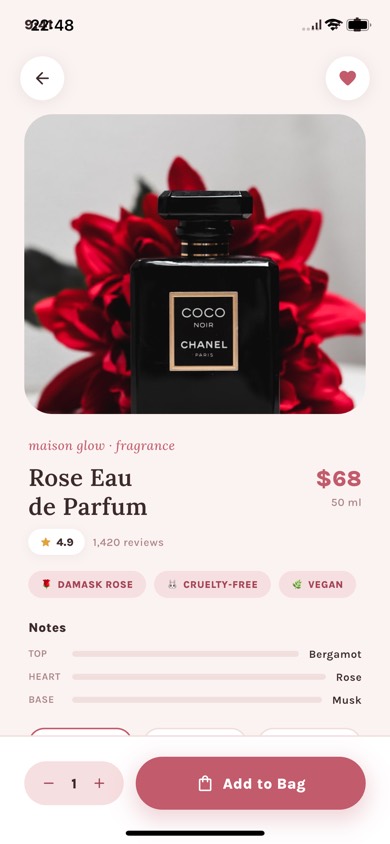
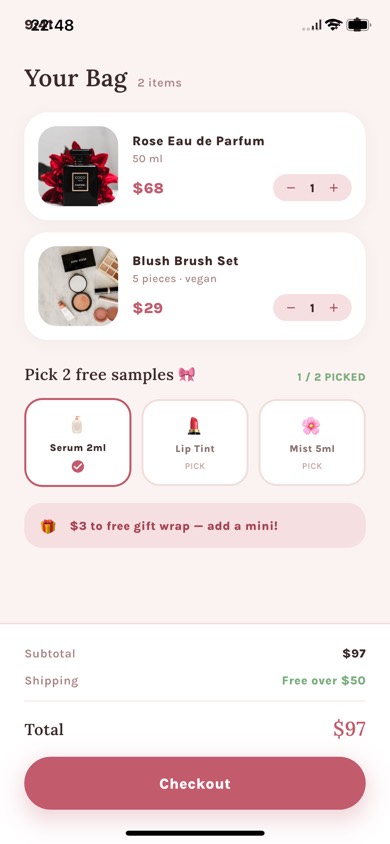
Glow Beauty · 16 screens (G01–G16) · #C25B6B · Lora + Karla
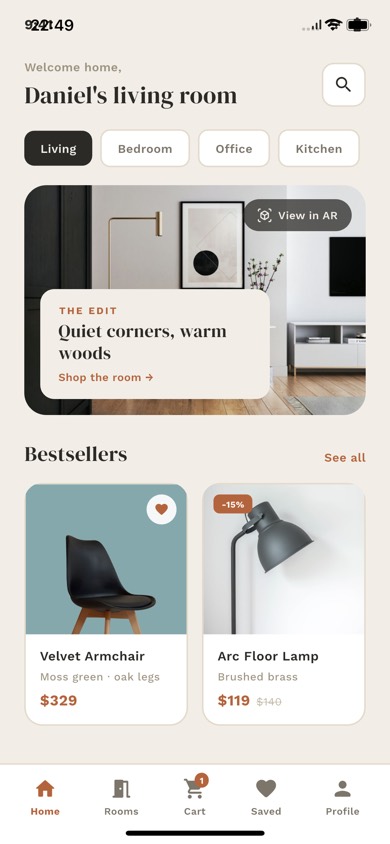
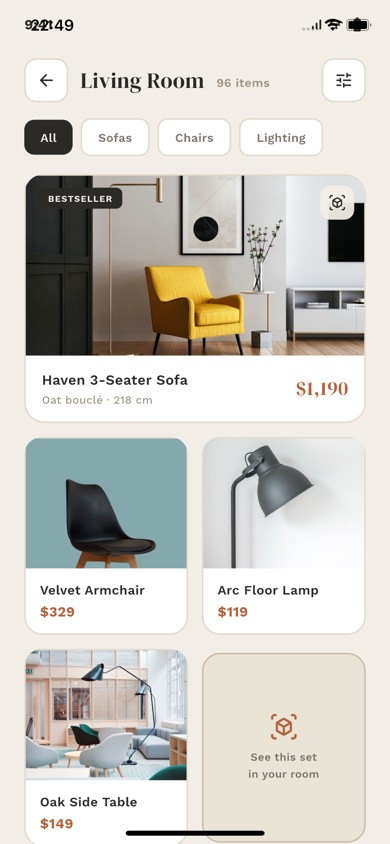
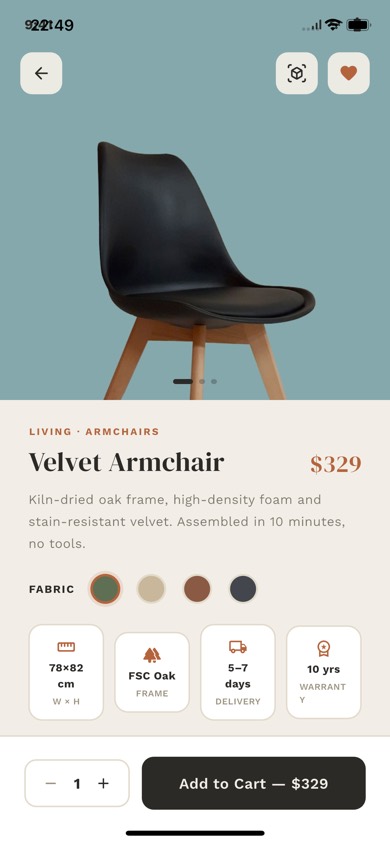
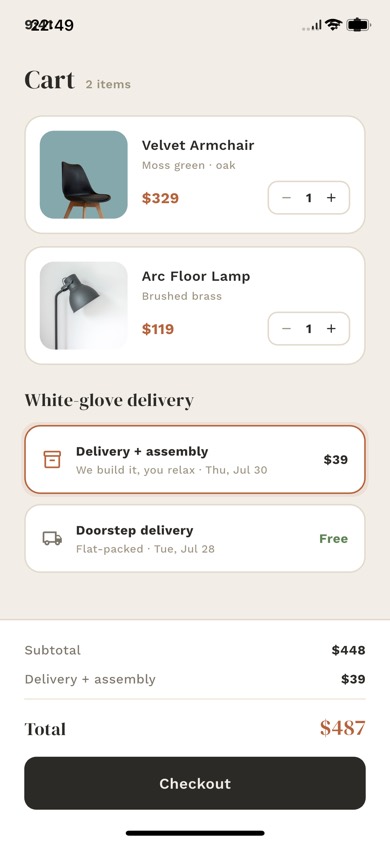
Nest Home & living · 16 screens (N01–N16) · #B4643C · DM Serif Display + Work Sans
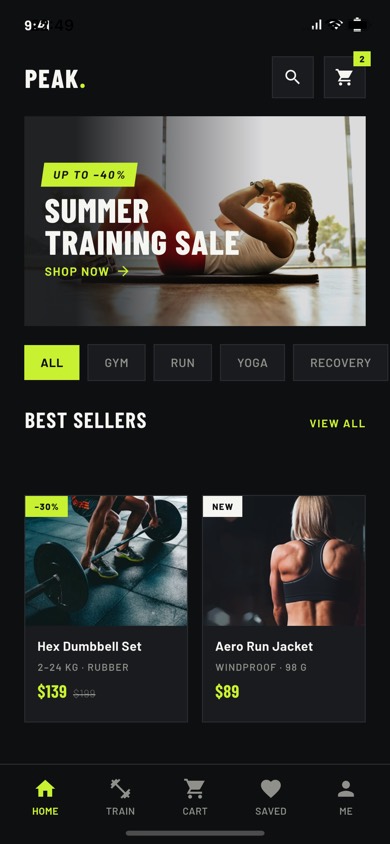
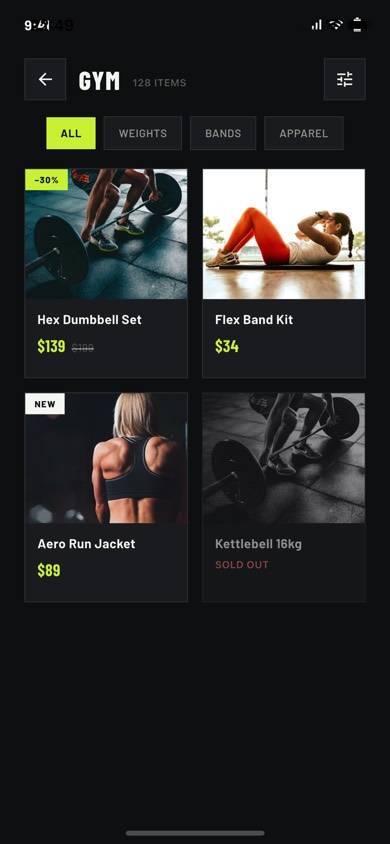
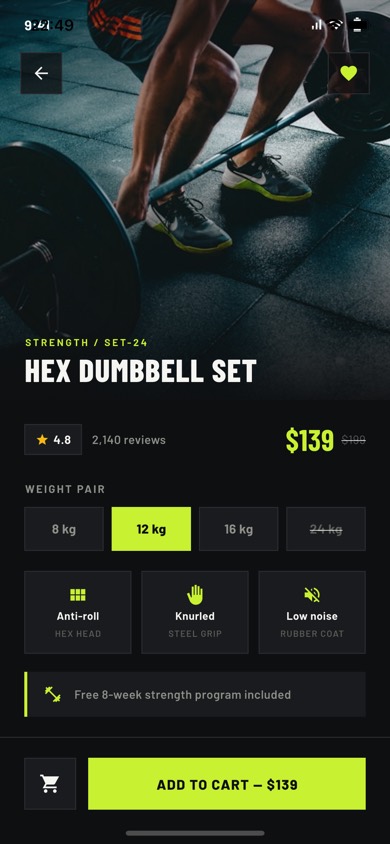
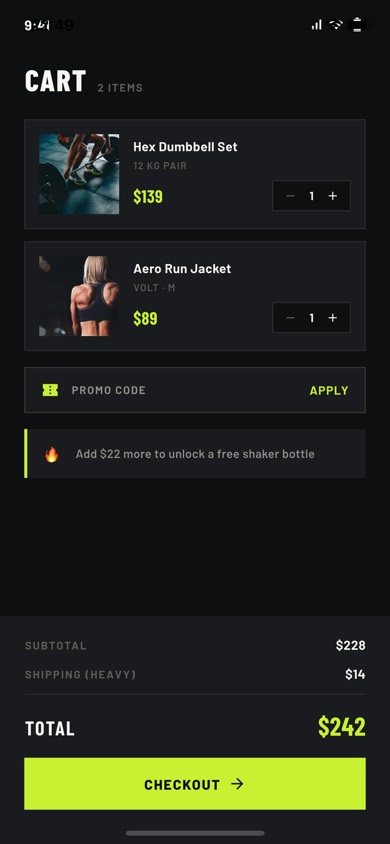
Peak Sport · 15 screens (K01–K15) · #C8F131 · Barlow Condensed + Barlow
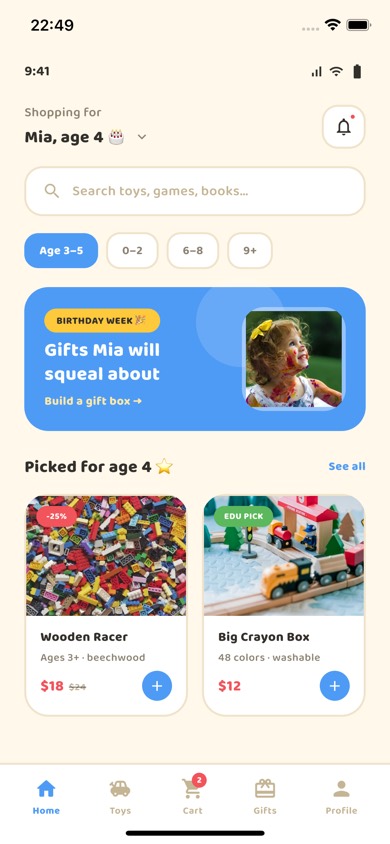
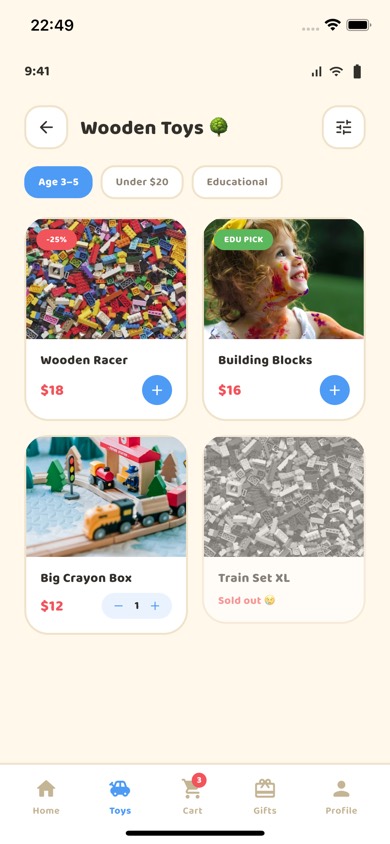
Tods Kids & gifts · 17 screens (T01–T17) · multi-accent · Baloo 2
Core User Flows
Every flow below is fully wired and clickable in the Core Kit demo. Route constants live in
shopkit/packages/shopkit_core/lib/routing/app_routes.dart; the GoRouter map that connects them is
shopkit/templates/core_kit/lib/router.dart. Niche templates use the same screen order with their own
lib/app_routes.dart.
1 · Launch & onboarding
| Step | Route | Screen file | What happens |
|---|---|---|---|
| Splash | AppRoutes.splash → / | s01_splash.dart | Brand screen, auto-advances to onboarding. |
| Onboarding | /onboarding/1…3 | s02–s04 | Three swipeable value slides; “Skip” jumps to Welcome. |
| Welcome | AppRoutes.welcome | s05_welcome.dart | Login / Register / “Continue as guest”. Guest goes straight to Home. |
2 · Authentication
| Step | Route | Screen file | What happens |
|---|---|---|---|
| Login | AppRoutes.login | s06_login.dart | Email + password, social buttons. On submit → Home. |
| Register | AppRoutes.register | s07_register.dart | Sign-up form → OTP. |
| OTP | AppRoutes.otp | s08_otp.dart | 4-digit code with resend timer → Success state. |
| Forgot / Success | /forgot, /success | s09, s10 | Password reset request and the shared confirmation layout. |
All auth screens call back into your code through onSubmit / onVerify / onGuest
callbacks — they never talk to a backend themselves.
3 · Browse → buy (the main shopping flow)
| Step | Route | Screen file | What happens |
|---|---|---|---|
| Home | AppRoutes.home → /home | s11_home.dart | Banner carousel, categories, flash sale, product grid, bottom nav. |
| Catalog | AppRoutes.productList → /products | s14_product_list.dart | Grid list for a category, sort + filter entry points. |
| Search | AppRoutes.search → /search | s15_search.dart | Recent searches, suggestions, empty result state (s45). |
| Filter | AppRoutes.filterSheet → /filter | s16_filter_sheet.dart | Bottom sheet: price range, brand, rating, colour. |
| Product detail | AppRoutes.product(id) → /product/:id | s17_product_detail.dart | Gallery, variants, reviews link (s18), “Add to cart” → Cart. |
| Cart | AppRoutes.cart → /cart | s19_cart.dart | Quantity steppers, coupon field, totals. Empty state is s20. |
| Checkout | AppRoutes.checkout → /checkout | s21_checkout.dart | Address picker, shipping method, order summary → Payment. |
| Payment | AppRoutes.payment → /payment | s22_payment.dart | Saved cards, add card (s38), pay button → Order Success. |
| Order success | AppRoutes.orderSuccess → /order/success | s23_order_success.dart | Confirmation with order number and “Track order”. |
4 · After the order
| Step | Route | Screen file |
|---|---|---|
| My orders | AppRoutes.myOrders → /orders | s24_my_orders.dart |
| Order tracking | AppRoutes.orderTrack(id) | s25_order_tracking.dart |
| Order detail | AppRoutes.order(id) | s39_order_detail.dart |
| Return request | AppRoutes.returnRequest | s40_return_request.dart |
5 · Account & supporting screens
- Profile group — Profile
s26, Addressess27(+ Add addresss37), Settingss28, Wishlists29, Notificationss30, Couponss31, Support chats32, Seller stores41, Loyalty pointss42, Help centres43, Language & currencys44. - Dark variants — Home
s33, Product details34, Carts35. - Empty & error states — No results
s45, No connections46, 404s47, Empty notificationss48.
Transitions come from SkRouteTransitions.fade / .slideUp — see Routing.
Branding Guide no coding required
Making ShopKit look like your brand takes three edits: colours, font, and app icon. You do not need to
understand Dart — you are replacing values, not writing logic. After every change, save the file and press
r in the terminal running flutter run to hot-reload.
Step 1 — Your colours
Open shopkit/packages/shopkit_core/lib/theme/themes/core_theme.dart. Near the top you will find a
block of colours written as Color(0xFFRRGGBB). 0xFF is just a prefix meaning “fully
opaque”; the last six characters are an ordinary hex colour. Replace them with your own:
ShopKitColors get colors => const ShopKitColors(
      background: Color(0xFFFBFBFD),   // page background
      surface:    Color(0xFFFFFFFF),   // cards, sheets, app bar
      text:       Color(0xFF16161D),   // headings and body text
      textSecondary: Color(0xFF6E7385),// captions, helper text
      accent:     Color(0xFF4353E6),   // ← your brand colour: buttons, links, active tabs
      border:     Color(0xFFE9EBF2),   // input and card outlines
      divider:    Color(0xFFF1F2F7),   // thin separators
      success:    Color(0xFF22B573),   // “order placed”, in-stock
      warning:    Color(0xFFF79009),   // “low stock”, pending
      error:      Color(0xFFF04438),   // validation errors, failed payment
      accentTonal:Color(0xFFEDEFFD),   // 10% tint of accent — chips, badges
      textMuted:  Color(0xFF9CA1B0),   // disabled text
    );
In most cases changing accent alone is enough to rebrand the whole app.
The nine niche themes live in one file —
shopkit/packages/shopkit_core/lib/theme/themes/all_themes.dart — each as its own block with the same
colour names:
| Theme | Class in all_themes.dart | Default accent |
|---|---|---|
| Electro | ElectroTheme | 0xFF22D3EE |
| Aura | AuraTheme | 0xFFA5842E |
| Pawly | PawlyTheme | 0xFFE8701B |
| Fresho | FreshoTheme | 0xFF3E9B4F |
| Fold | FoldTheme | 0xFF111111 |
| Glow | GlowTheme | 0xFFC25B6B |
| Nest | NestTheme | 0xFFB4643C |
| Peak | PeakTheme | 0xFFC8F131 |
| Tods | TodsTheme | multi-accent |
Step 2 — Your font
Fonts come from the free Google Fonts library through the
google_fonts package, so switching family is a one-word change. In
core_theme.dart look for:
GoogleFonts.plusJakartaSans(   // ← change this one word
  fontSize: size,
  fontWeight: weight,
  …
)
Replace plusJakartaSans with any family name in camelCase — inter, poppins,
montserrat, roboto, dmSans, manrope. In
all_themes.dart each theme has the same call inside its fontBuilder: line
(Electro uses spaceGrotesk, Pawly nunito, Tods baloo2, and so on).
Google Fonts are downloaded on first launch and cached. If you need a fully offline build, bundle the
.ttf files with the standard Flutter fonts: section in pubspec.yaml and
replace the GoogleFonts.x(...) call with TextStyle(fontFamily: 'YourFont', …).
Step 3 — Your logo, app name and icon
| What | Where | How |
|---|---|---|
| Wordmark on the splash screen | shopkit/packages/shopkit_core/lib/screens/core/s01_splash.dart |
Replace the 'ShopKit' text with your brand name, or swap the widget for an
Image.asset('assets/logo.png'). |
| App icon | design-source/assets/app-icon.png (1024×1024, at the root of the download) |
Replace that PNG with your own square icon, then generate every platform size:
flutter_launcher_icons. Run it
after flutter create ., because it needs the platform folders.
The PNG opens in any image editor — no design software required, see Design Files. |
| Name under the icon (Android) | android/app/src/main/AndroidManifest.xml |
Edit android:label="ShopKit". |
| Name under the icon (iOS) | ios/Runner/Info.plist |
Edit CFBundleDisplayName and CFBundleName. |
| Bundle id / package name | generated by flutter create |
Pass your own, e.g. --org com.yourcompany, when you run the create step. |
| Title in the task switcher | lib/app.dart, line 17 |
Edit title: 'ShopKit'. |
Step 4 — Corner radius (optional)
Each theme exposes radiusSm, radiusMd, radiusLg next to its colours.
Core Kit uses 14 / 14 / 20. Lower them for a sharper look, raise them for a softer one — every card,
button and sheet follows automatically.
Replacing the Placeholder Images
The demo product photography is loaded from Unsplash CDN URLs and is meant for preview only. Replace it with images you own or have licensed before you publish your app.
Where the URLs live
Every product image comes from the mock repository of the template you are running:
shopkit/templates/core_kit/lib/data/mock/mock_product_repository.dartInside you will find entries like:
Product(
  id: '1',
  title: 'Oxford Derby',
  price: 89.00,
  imageUrl: 'https://images.unsplash.com/photo-1449505278894-…?w=800&q=80',
)
Each niche template has its own copy at
shopkit/templates/<theme>/lib/data/mock/mock_product_repository.dart.
Option A — point at your own image URLs (fastest)
Replace each imageUrl with a URL from your own server or CDN. Nothing else changes; images keep
loading over the network.
Option B — bundle local images (works offline)
- Create the folder
assets/images/products/inside your template (it does not exist yet) and put your files there, e.g.sneaker-01.jpg. - Declare it in that template's
pubspec.yaml— theassets:block already exists incore_kit/pubspec.yaml:flutter: uses-material-design: true assets: - assets/app-icon.png - assets/images/products/ - Point the mock data at the asset path instead of a URL:
imageUrl: 'assets/images/products/sneaker-01.jpg', - Switch the shared image widget from network to asset. Open
shopkit/packages/shopkit_core/lib/screens/core/_shared/sk_network_image.dartand changeImage.network(url, …)toImage.asset(url, …). Every screen that usesSkNetworkImagefollows automatically. - Run
flutter pub getand do a full restart (R, notr) — asset changes are not hot-reloaded.
A handful of niche screens call Image.network directly for editorial layouts
(for example templates/electro/lib/screens/e02.dart, e04.dart, and
templates/tods/lib/screens/t02.dart onward). Search your template for
Image.network to catch those.
Broken image? That is by design
SkNetworkImage has a built-in fallback: if a URL fails (no internet, dead link) it draws a soft grey
block with a picture icon instead of crashing. If you see that block everywhere, check your connection first.
Other placeholder content
- User avatars and names (“Daniel Carter”) — mock data in the same
data/mock/folder. - Prices, ratings, stock —
mock_product_repository.dart. - Icons — Flutter's built-in Material Symbols, no asset files to replace.
Design Files no design software needed
The download contains a design-source/ folder at the top level, next to
documentation/. It holds the original design of every screen and the editable app icon.
You do not need Photoshop, Illustrator, Sketch, Figma or Adobe XD to open any of it — the
screen designs are ordinary web pages that open in the browser you are reading this in, and the icon is a PNG
image that opens in any image viewer or editor. There are no PSD, AI or Sketch files in this item.
Start with design-source/START-HERE.html — double-click it and your browser lists every design
file with a description and a link. design-source/README.txt is the same information as plain text
if you prefer to read it in a text editor.
| File or folder | What it is | Open it with |
|---|---|---|
design-source/START-HERE.html |
Index of every design file, in plain language | Any web browser (double-click) |
design-source/README.txt |
The same index as plain text | Any text editor |
design-source/screens/ |
The design of all 192 screens as web pages, drawn at 390 × 844 px (iPhone 13/14 size). Every Flutter screen in this template was built from these, pixel for pixel. One file per theme, plus a components page, a typography page and a screen-inventory page that links to them all. | Any web browser (double-click a .html file) |
design-source/assets/app-icon.png |
The app icon, 1024 × 1024 PNG with transparency. This is the one file you are expected to replace with your own logo. | Any image viewer, or an editor such as Preview, Paint, GIMP, Photoshop or Figma |
Which design file belongs to which screen
Every screen carries a code in the design pages, and that code is the name of its Dart file — so you can go from a design straight to the code that draws it:
| Design code | Dart file |
|---|---|
S17 (Core Kit page) |
shopkit/packages/shopkit_core/lib/screens/core/s17_product_detail.dart |
E05 (Electro page) |
shopkit/templates/electro/lib/screens/e05_product_detail.dart |
Changing the design
You do not edit the HTML design files to change how the app looks — they are the reference, not the app. The
colours, fonts, radii and spacing they show are listed as copy-and-paste values in the
Branding Guide and Theming & Customization sections, and
those are the files you edit. To change the app icon, replace
design-source/assets/app-icon.png and run
shopkit/tools/apply_app_icon.sh <template>; step-by-step instructions are in
Branding Guide, step 3.
The same designs are also browsable online at shopkit.webkodingtheme.com/demo.
Troubleshooting
Almost every first-run problem is one of the following. Run flutter doctor -v first — it catches
missing toolchains before you touch ShopKit.
| What you see | Why | Fix |
|---|---|---|
No application found for TargetPlatform…Error: No pubspec.yaml file foundor there is no android/ / ios/ folder |
The platform folder for your target does not exist yet — the niche templates ship ios/ only —
and the flutter create . step was skipped (or you are in the wrong folder). |
From inside the template folder:
|
Because core_kit depends on shopkit_core from path which doesn't exist… |
The template was moved out of the monorepo, so its relative path to
packages/shopkit_core broke. |
Keep the folder layout, or produce a self-contained copy:
|
Target kernel_snapshot_program failed: ExceptionThe argument type 'Color?' can't be assigned to the parameter type 'Color'No named parameter with the name '…' |
Flutter/Dart SDK is older than the template requires. | flutter --version must be 3.24 or newer. Then:
|
Command PhaseScriptExecution failed with a nonzero exit code (iOS build) |
Stale CocoaPods or Xcode derived data. | |
Error launching application on <device>CoreSimulator … SimError code=405 |
The iOS simulator is in a bad state — not a code problem. | Quit the Simulator, then
|
| Gradle / Android build fails on first run | Android SDK, licences or a stale Gradle cache. | |
Fonts look like the system default; console shows a google_fonts network error |
Google Fonts are fetched on first launch; the device had no internet. | Connect once so the fonts cache, or bundle the .ttf files locally
(see Branding → Step 2). |
| Grey blocks with a picture icon instead of product photos | Demo images are remote Unsplash URLs and could not be reached. | Expected offline behaviour — the fallback in SkNetworkImage. Connect, or switch to local
assets (see Replacing the Placeholder Images). |
A RenderFlex overflowed by … pixels after you edit a screen |
Longer text or a bigger font than the 390×844 design allows. | Wrap the offending column in SingleChildScrollView, or the text in
Expanded / Flexible. Shipped screens are laid out for 390×844. |
Changes to images or pubspec.yaml do not appear |
Hot reload does not pick up asset or manifest changes. | Press R (capital) for a full restart, or stop and flutter run again. |
Still stuck? See Support — include your OS, flutter doctor -v output and the
template name.
Project Structure
What you unzipped:
├── README.txt # Quick start
├── documentation/ # This guide (index.html)
├── design-source/ # Screen designs + app icon — see Design Files
├── LICENSE.txt
├── Changelog.txt
└── shopkit/ # The Flutter codeAnd inside shopkit/:
shopkit/
├── packages/
│ ├── shopkit_core/ # UI, themes, S01–S48 screens
│ └── shopkit_domain/ # Models + repository interfaces
├── templates/
│ ├── core_kit/ # Core Kit demo app
│ ├── electro/ # Tech theme (E01–E17)
│ ├── showcase/ # Hub app — browse every theme
│ └── … # 8 more niche templates
├── tools/
│ ├── extract_template.sh # Ship one theme as a standalone app
│ └── apply_app_icon.sh # Generate every platform icon size
└── backends/ # Future API layer (placeholder)Dependency rule: UI never imports HTTP/API. Templates inject mock or remote data via
AppRepositories.
Core Kit Guide
48 screens (S01–S48) covering auth, catalog, product, cart, checkout, orders, profile, dark variants, and empty states.
Screen naming: S17 → s17_product_detail.dart
Design reference: the screen designs in design-source/screens/, drawn at 390×844 px. They open in
a web browser — see Design Files.
Template Guide
Extract a single template as a standalone project:
cd shopkit/tools
./extract_template.sh electro ../../output/electro-standalone
cd ../../output/electro-standalone
flutter pub get
flutter create . --platforms=ios,android --project-name electro --org com.yourcompany
flutter run| Template | Prefix | Screens | Vertical |
|---|---|---|---|
| Core Kit | S01–S48 | 48 | General e-commerce |
| Electro | E01–E17 | 17 | Tech |
| Aura | A01–A16 | 16 | Luxury fashion |
| Pawly | P01–P16 | 16 | Pet |
| Fresho | F01–F15 | 15 | Grocery |
| Fold | FL01–FL16 | 16 | Fashion lookbook |
| Glow | G01–G16 | 16 | Beauty |
| Nest | N01–N16 | 16 | Home |
| Peak | K01–K15 | 15 | Sport |
| Tods | T01–T17 | 17 | Kids / gifts |
Theming & Customization
All themes implement ShopKitTheme with ShopKitColors and ShopKitTypography.
A template picks its theme on line 15 of lib/app.dart:
import 'package:shopkit_core/shopkit_core.dart';

final theme = ElectroTheme.instance; // or CoreKitTheme, AuraTheme, PawlyTheme, …
MaterialApp.router(theme: theme.themeData, routerConfig: router)
Swapping that one line re-skins the entire app. For editing the tokens themselves — colours, fonts, radii — see the step-by-step Branding Guide.
Components Reference
SkPrimaryButton/SkSecondaryButtonSkTextField/SkLabeledFieldSkProductGridCard/SkOrderCardSkBottomNav/SkAppBarSkEmptyLayout/SkSuccessLayoutSkShopkitDialog/SkSnackbarSkNetworkImage— image loading with a built-in placeholder fallbackSkQtyStepper/SkPriceText/SkRatingStars
All components take their look from the active theme — they never hard-code a colour or font.
Navigation & Routing
Route constants: AppRoutes in shopkit_core. Transitions:
SkRouteTransitions.fade / .slideUp.
GoRoute(
  path: AppRoutes.productDetail,
  pageBuilder: SkRouteTransitions.slideUpBuilder(
    (context, state) => S17ProductDetailScreen(theme: theme, …),
  ),
)
The full map for the Core Kit lives in templates/core_kit/lib/router.dart; see
Core User Flows for how the screens connect.
Third-Party Services & Costs
ShopKit is a Flutter UI template. It runs entirely on bundled mock data — no account, server or subscription is needed to open it, run it, or explore all 192 screens.
If you later choose to connect a backend service, or to turn the Nest AR preview screen into working augmented reality, that will involve external costs you pay directly to those providers. They are separate products from other companies, not included in this purchase, they need your own account, and their fees are set by them and can change at any time:
- Firebase (Google) — free Spark tier plus usage-based paid plans. Not included.
- Shopify — paid monthly subscription required for a Storefront API account. Not included.
- WooCommerce — the plugin is free, but WordPress hosting, a domain, an SSL certificate and some extensions are paid. Not included.
- Laravel / Node / Strapi or any custom API — you supply and pay for the hosting. Not included.
- Payment gateways (Stripe, PayPal, iyzico …) — per-transaction fees set by the provider. Not included.
- Google Play Console — one-off registration fee; Apple Developer Program — annual fee. Required to publish your app, not included.
- Demo photography — loaded from Unsplash CDN URLs for preview only. Replace it with images you own or have licensed before publishing (see Replacing the Placeholder Images).
The Nest "AR preview" screen
The view in your room screen in the Nest theme (N05) is a static UI
layout — a designed Flutter screen with a placeholder image. It has no AR functionality, no
camera access and no 3D model rendering, and it calls no AR service. ShopKit bundles no AR package;
the full dependency list is google_fonts and go_router.
To make it perform real augmented reality you must build that yourself with a third-party AR SDK or service — ARCore, ARKit, a Flutter AR plugin, or a hosted 3D/AR commerce provider. Setting up functional AR will involve external costs that you pay directly to those providers, on top of what you paid for this item. Those are separate products from other companies, are not included in this purchase, and need your own account. Budget for at least three things: a monthly subscription or per-view charge from the AR/3D provider, the creation or conversion of a 3D model for every product you want to show (paid service or paid software), and usage-based hosting and bandwidth for those models. Check the provider's current pricing page before you build a feature that depends on it.
Fonts are loaded through the google_fonts package under the SIL Open Font License, and icons use
Flutter's built-in Material Symbols — both free to use commercially.
ShopKit ships no integration code for any of the services above. What it ships is the clean seam that makes
adding one straightforward: implement the repository interfaces in shopkit_domain and swap
AppRepositories.mock() for your own implementation — no screen changes.
FAQ
What are the requirements?
Flutter SDK 3.24+, Dart 3.5+, and either Xcode (for iOS/macOS) or Android Studio / Android SDK. Any editor works; VS Code and Android Studio are the common choices. A backend is not required.
How do I switch from mock data to a real API?
Implement the repository interfaces from shopkit_domain, add a data/remote/ folder in your
template, and swap AppRepositories.mock() for AppRepositories.remote() in
main.dart. Screens do not change — they only know the interface.
Is a backend included?
No. ShopKit is a UI template with mock data. See Third-Party Services & Costs for what a backend would involve.
Can I use only one template?
Yes — run extract_template.sh to get a standalone folder containing core + domain + one template.
Where are the product images?
They are remote Unsplash URLs used for the demo only — see Replacing the Placeholder Images.
Does it support dark mode?
Yes. Core Kit ships dedicated dark screens (S33–S35), every niche theme has a dark
variant, and Electro is dark by default. Colours come from theme tokens, so a dark palette is a token swap.
Can I publish an app built with ShopKit?
Yes. One Regular License covers one end product. Reselling the template itself, or distributing the source, is not
permitted — see the Envato licence terms in LICENSE.txt.
Support
Need help with ShopKit? Email support@webkoding.com.
You can also use the Comments / item support tab on the CodeCanyon product page once the item is live. We aim to reply within 48 hours on business days.
Before writing, please:
- Read this documentation — especially Getting Started and Troubleshooting
- Confirm Flutter
3.24+and thatflutter doctoris clean - Include your OS, Flutter version, and the template you are running (e.g. Core Kit / Electro)
- Attach screenshots or error logs when possible
Support covers ShopKit itself (setup, bugs, documentation gaps). It does not include custom feature development, full app builds for your store, or third-party API/backend setup — unless arranged separately.